Introduction to Tui Na: 13 Massage Techniques You Can Learn Quickly
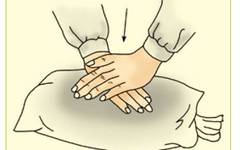
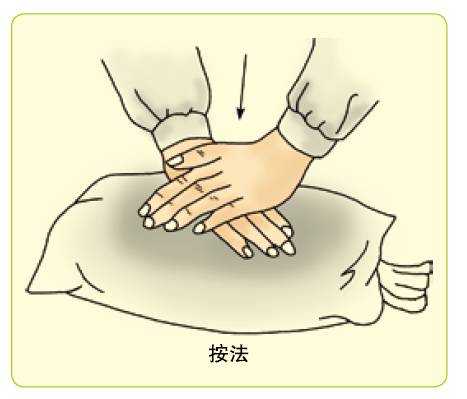
1. Pressing Technique
Method: Use the base of the palm, the root of the thumb, or the elbow tip to apply pressure on the treatment area, pressing vertically downwards. Often combined with the kneading technique, referred to as “press and knead”.
Key Points: ① Gradually increase pressure while pressing. ② When working on the back, press down in sync with the recipient’s exhalation, applying force momentarily.
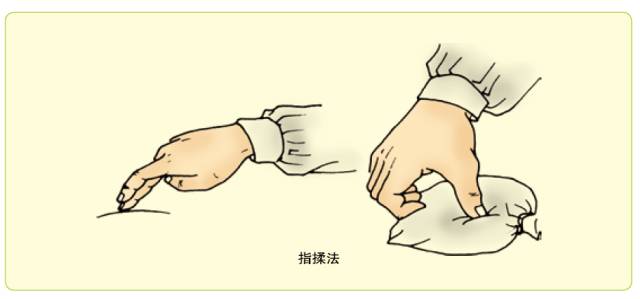
2. Kneading Technique
Method: ① Finger kneading: Use the fingertips to apply circular kneading motions on acupoints, applicable to various body parts. ② Palm kneading: Use the palm to apply circular kneading motions on acupoints, suitable for the lower back and abdomen. ③ Thenar kneading: Use the thenar eminence to apply circular kneading motions on acupoints, suitable for the face.
Key Points: ① Use the proximal part of the limb to drive the distal part in small circular kneading motions, such as using the forearm to drive the wrist and palm for palm kneading.
② The pressure point should firmly contact the acupoint, engaging deeper tissues. ③ Maintain even pressure, with coordinated and rhythmic movements.
3. Pushing Technique
Method: ① Palm pushing: Use the palm to apply linear pushing in one direction on the treatment area, suitable for the back, chest, abdomen, and lower limbs. ② Finger pushing: Use the fingers to apply linear pushing in one direction on the treatment area, suitable for tendons. ③ Thumb spreading: Place the radial sides of both thumbs on the forehead, pushing outward from the midline.
Key Points: ① The pressure point should closely contact the skin, with moderate pressure, ensuring it is light yet firm. ② When pushing, the fingers should be in front, with the palm base behind. ③ Maintain a steady speed.
4. Rubbing Technique
Method: Use the palm or the surfaces of the index, middle, ring, and little fingers to contact the treatment area, moving in circular motions either clockwise or counterclockwise using the wrist and forearm.
Key Points: ① Keep the upper limb and wrist relaxed, lightly resting on the acupoint. ② Movements should be gentle and coordinated, with light pressure and slow speed.

5. Wiping Technique
Method: ① Palm wiping: Use the palm to perform rapid back-and-forth linear wiping motions on the treatment area, suitable for the lower back, limbs, and shoulders. ② Thenar wiping: Use the thenar eminence to perform rapid back-and-forth linear wiping motions on the treatment area, suitable for the upper limbs and neck-shoulder area.
Key Points: ① Wiping should be done in a straight line, avoiding slanting. ② The pressure point should closely contact the skin, with moderate pressure. ③ Movements should be continuous, with uniform and fast speed, maximizing the distance of back-and-forth motions.
6. Grasping Technique
Method: Use the thumb and the other four fingers to apply rhythmic pinching on the treatment area, often combined with other techniques, suitable for the neck, shoulders, and limbs.
Key Points: ① Keep the forearm relaxed, with the palm empty. ② When pinching, the direction should be perpendicular to the muscle belly, primarily using the metacarpophalangeal joint, with the interphalangeal joints remaining still. ③ Movements should be fluid, with pressure gradually increasing.
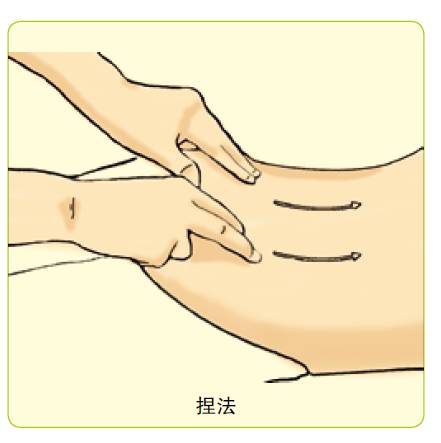
7. Pinching Technique
Method: ① Three-finger pinching: With both wrists slightly extended, place the thumb horizontally against the skin, and the index and middle fingers on the skin in front of the thumb, pinching the skin with three fingers while alternating hands. ② Two-finger pinching: With both wrists slightly ulnar deviated, place the radial side of the middle phalanx of the index finger against the skin, and the thumb in front of the index finger, pinching the skin with the thumb and index finger while alternating hands.
Key Points: ① Pinch in a straight line, avoiding slanting. ② The tightness of the skin during pinching should be appropriate.
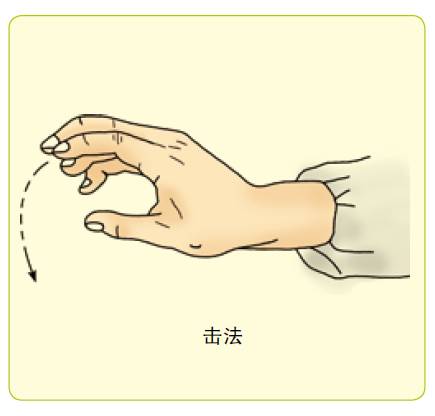
8. Striking Technique
Method: Use the fingertips to rhythmically strike the body surface, suitable for the head.
Key Points: ① Keep the wrist relaxed, allowing the elbow joint to drive the wrist freely. ② Striking should be elastic and rhythmic.
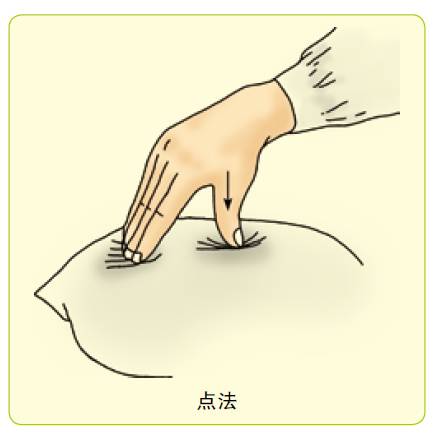
9. Pointing Technique
Method: Use the fingertip to apply sustained pressure on acupoints, with the option for momentary force.
Key Points: Maintain a certain posture with the fingers, avoiding excessive extension or flexion to prevent injury.
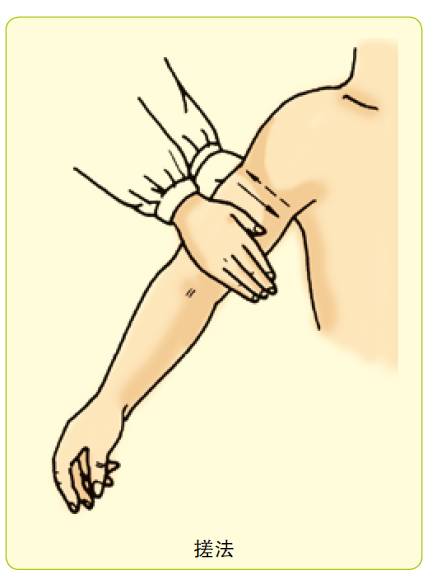
10. Rubbing Technique
Method: Use both hands to grasp the limb with opposing force, performing rapid rubbing motions in opposite directions while moving up and down, suitable for the upper limbs.
Key Points: ① Apply symmetrical force. ② Rubbing should be fast, while movement should be slow.
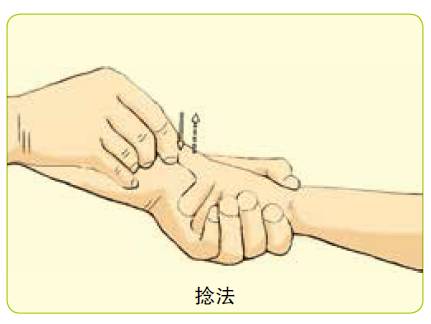
11. Twisting Technique
Method: Use the textured surface of the thumb and the radial edge of the index finger to grasp the treatment area, performing rapid up-and-down twisting motions, suitable for the fingers and ears.
Key Points: ① Twisting should be fast, while movement should be slow. ② The index finger should primarily drive the motion, with the thumb assisting. ③ Movements should be coherent.
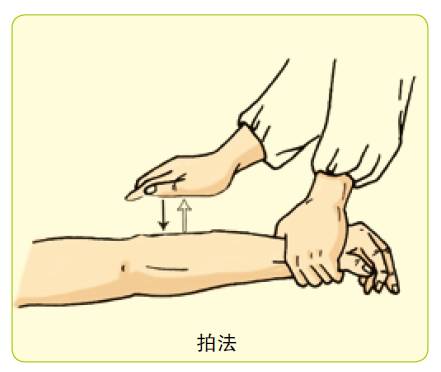
12. Patting Technique
Method: With fingers together and slightly bent, use the forearm to freely flex and extend the wrist, allowing the fingers to strike first, followed by the wrist; and the wrist to lift first, followed by the fingers, patting the body surface lightly.
Key Points: ① Ensure a light patting motion. ② The wrist should move freely, and the elbow should flex freely. ③ Hands can work together.
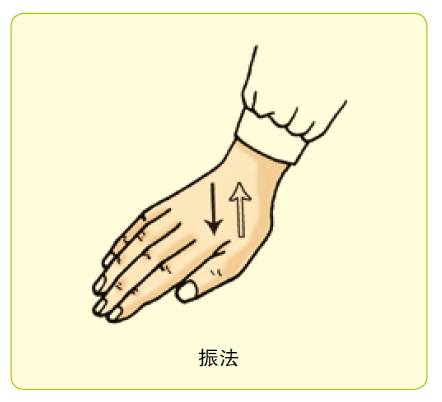
13. Vibrating Technique
Method: ① Palm vibration: Place the palm on a specific area, performing continuous, rapid, up-and-down vibrations, suitable for the abdomen and lower back. ② Finger vibration: Use the tips of the index and middle fingers on acupoints, performing continuous, rapid, up-and-down vibrations.
Key Points: ① The pressure point should closely contact the skin. ② The frequency should be fast, approximately 200-300 vibrations per minute.