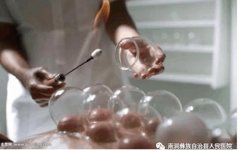
Cupping therapy, also known as “fire cupping” or “suction therapy,” refers to the practice of placing cup-shaped instruments on affected areas or specific acupuncture points. By using fire or heat to remove air from the cups, a negative pressure is created, causing the cups to adhere tightly to the skin. This negative pressure effect leads to localized tissue congestion and is a commonly used external treatment method. In ancient China, cupping therapy was referred to as “jiao fa” or “jiao xi fa.” In recent years, as the side effects of medications have become more recognized, this unique therapy, which does not involve drugs and is painless yet effective, has gained increasing attention. Cupping therapy has seen vigorous development, widespread popularity, and an expanding range of applications, becoming a standalone method for treating diseases rather than just an adjunct to acupuncture, moxibustion, or herbal medicine. Currently, common clinical methods include stationary cupping, flash cupping, moving cupping, and bloodletting cupping, which can also be used in combination during treatment.
Characteristics of Cupping Therapy
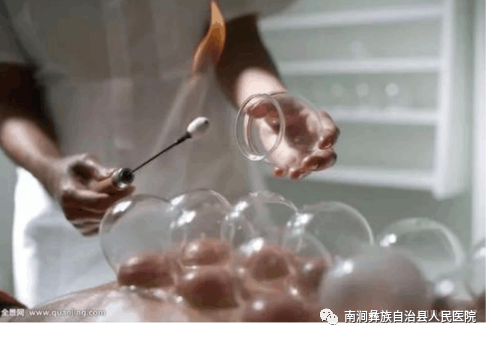
Non-invasive and painless, making it particularly suitable for patients who fear needles and injections. It is safe, reliable, and effective. It does not involve gastrointestinal administration, thus avoiding damage to the spleen and stomach, with no side effects or individual specificity. It can be performed under any conditions, whether sitting, lying down, or standing, indoors or outdoors, at any time and place. It is easy to learn and understand, making it accessible for the public and in areas with limited medical resources. When using medicated cups, only a small amount of herbal material is needed, which is highly efficient and beneficial for conserving herbal resources.
Principle of Cupping Therapy
Cupping stimulates the body through heat and mechanical negative pressure, leading to localized hyperemia and capillary dilation, which triggers both local and systemic responses, thereby adjusting the body’s functions and eliminating pathological factors to achieve therapeutic effects.
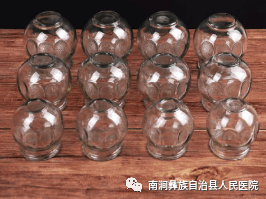
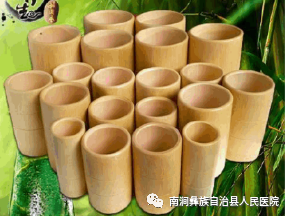
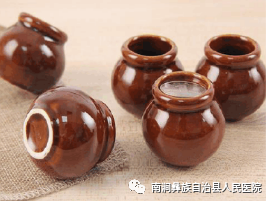
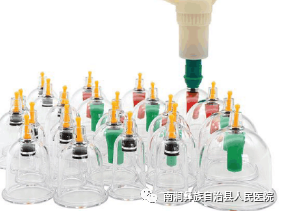
Equipment selection: glass cups, bamboo cups, ceramic cups, suction cups; ignition tools (hemostatic forceps, 95% alcohol cotton balls, lighter).
Selection of Application Sites
Select the sitting, lying, side-lying, or prone position based on the cupping site.
Procedure for Cupping Therapy
1. Determine the points:
Select the cupping site and method based on the patient’s condition.
2. Cupping:
(1) Check for any damage or cracks in the cup.
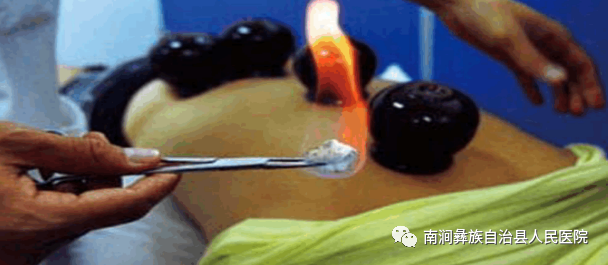
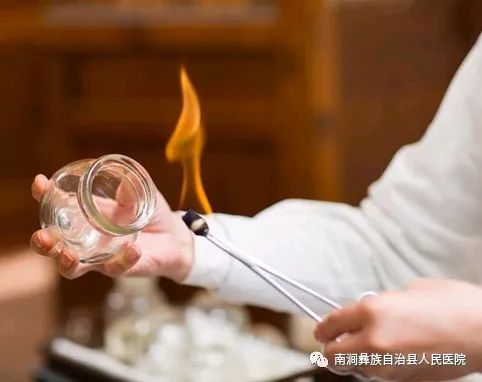
(2) Hold the cup in one hand and use the hemostatic forceps to ignite a 95% alcohol cotton ball, inserting it into the lower part of the cup, rotating it for 1-2 circles before quickly removing it and placing the cup on the selected area (acupuncture point) without moving it. Once it adheres, release your hand and leave the cup in place as needed.
(3) Safely extinguish the flame by quickly placing the lit item into a small bottle.
3. Observation:
(1) Continuously check the suction status of the cup during the cupping process;
(2) Observe the degree of redness and purpleness of the local skin, with the best therapeutic effect achieved at a purplish-red color;
(3) Check for any burns or blisters on the skin, and if there is pain or excessive tightness, remove the cup promptly;
(4) The cupping duration is typically 10 minutes, and inquire about the patient’s feelings.
4. Remove the cup:
To remove the cup, hold the cup with one hand and press the skin around the cup’s edge with your thumb to allow air to enter the cup, making it easy to remove.
 Steps for Cupping Technique
(1) Flash cupping: Choose a cup of appropriate size. Hold the hemostatic forceps with a 95% alcohol cotton ball in one hand and the cup in the other. After igniting the alcohol cotton ball, quickly insert it into the cup, rotating it 1-3 times before removing it and immediately placing the cup on the selected area, then quickly removing it. Repeat this process multiple times until the skin at the treatment site is reddened and congested. The flash time should be short to avoid excessive suction, which can cause pain when pulling the cup.
(2) Moving cupping:
1. Apply a medium: evenly apply a lubricating medium on the edges of the cup and the treatment area;
2. Cupping: The method is the same as ordinary cupping, but the suction strength should be controlled to ensure the cup adheres tightly to the skin without being too tight, allowing the cup to slide smoothly over the skin.
3. Move the cup: Once the cup is securely attached, slide it back and forth along the direction of the treatment area until the skin is evenly reddened and has petechiae. 4. Remove the cup: The removal method is the same as for stationary cupping, and after removal, clean the lubricating medium from the skin surface.
(3) Stationary cupping:
1. Fire cupping:
(1) Flash cupping: Hold the hemostatic forceps with a 95% alcohol cotton ball in one hand and the cup in the other. Prepare the cup close to the treatment area, ignite it, quickly insert it into the cup, rotating it 1-3 times before quickly removing it and placing the cup on the selected area.
(2) Fire throwing method: Use an alcohol cotton ball or paper, ignite it, and quickly place it inside the cup, then immediately place the cup on the selected area. This method is only suitable for lateral cupping on the body.
(3) Cotton sticking method: Use a 1-2 cm alcohol cotton ball, stick it to the middle or lower part of the cup’s inner wall, ignite it, and quickly place the cup on the selected area.
2. Suction cup method: Place the suction cup on the selected area and remove the air to create negative pressure, adhering it to the skin.
3. Cupping and removal: Generally, leave the cup in place for 5-10 minutes. If blisters appear or the patient feels discomfort, the time should be adjusted accordingly. To remove the cup, hold the cup with one hand and press the skin around the cup’s edge with your finger to allow air to enter, releasing the suction, making it easy to remove the cup.
 Contraindications
Patients with high fever, convulsions, and coagulation disorders; skin ulcers, edema, and large blood vessels; pregnant women should avoid cupping on the abdomen and lower back.
 Precautions
1. When cupping, choose appropriate positions and areas with sufficient muscle. Avoid improper positions, movement, or areas with uneven bones or excessive hair.
2. Select cups of appropriate size based on the area being treated. The operation must be quick to ensure a tight suction.
3. When using fire cups, be careful not to burn or scald the skin. If burns or blisters occur due to prolonged cupping, minor burns do not require treatment, just cover with disinfected gauze to prevent rupture. For larger blisters, after disinfecting the skin, use a sterile syringe to withdraw the fluid or cover with disinfected gauze.
4. Avoid cupping on areas with allergies, ulcers, edema, and large blood vessels. Pregnant women should also avoid cupping on the abdomen and lower back.
5. When removing the cup, use a gentle technique. Press the skin around the cup’s edge with one hand to allow air to enter, making it easy to remove the cup. Do not pull or twist forcefully to avoid skin injury.


